
Converting to Non-Photo Blue
By: Katie Hearns
As a comic artist, you probably hear people occasionally blue line. In simple terms, blue line is a process of converting line art to a non-photo reproductive blue so that when work is scanned the blue will not be visible in the final product. For those who work traditionally you can buy non-photo blue pencils however if you want to enlarge a rough pencil sketch and rework it or if you work digitally and want to print out your line art for penciling or inking you may be wondering how can I print something in blue line? There are two methods that I know for turning line art into a non-photo blue. The easiest option is to use Clip Studio Paint (also know as Manga Studio.)
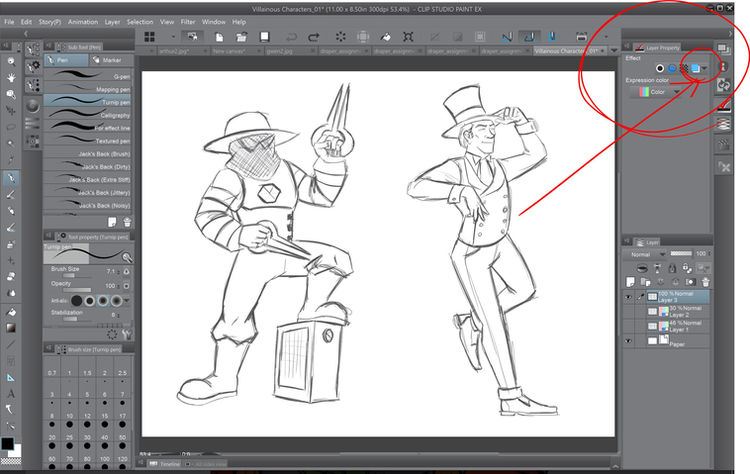
Clip studio paint provides a one click solution to converting line art to non-photo blue. In the screenshot below you can see the small blue icon at the top of my screen located under the layer properties panel. Once you scan in your artwork and open it in Clip Studio, all you have to do is click the button and it will automatically convert all of your line work to blue. You can adjust the color of the converted line work as you wish, I prefer to work over a lighter shade of blue than the default, but as far as I know blue is one of the easier colors to get rid of in the final product.

The alternative route for converting linear to blue line is through Photoshop. Photoshop requires more steps than Clip Studio so It may take some practice to remember how to do this. Once you import your scan to Photoshop you will need to change the image mode to grayscale (Image>Mode>Grayscale) and say yes when it asks to discard color information. Once you convert to grayscale you will once again change the image mode but this time you will change it to duotone (Image>Mode>Duotone.) When you select Duotone, Photoshop will give you a prompt like this one:

At this screen, you will see “Ink 1” and a black box. Select the black box and a color picker window will appear. From here you will go into the CMYK settings and change it to C:30 M:0 Y:0 K:0. This will give you a shade of blue that is light enough to be removed when you scan in your finished artwork. Other artist changes these settings based on their preferences; some prefer a 10%K instead so that they don’t have to worry about getting rid of the blue color.

And now you know how to convert your line art to non-photo blue! From here you just need to print out your line art and work over what you printed. This may require a larger printer but you can check with any print shop to see if they can print on Bristol, watercolor paper or whatever material you intend to work on. I hope this information was helpful to you and please share this information with your friends and fellow artists! If there is anything else you would like to see us provide information about or any other ways to convert artwork to blue line send us an email at comics@scaddistrict.com. We want to continue to grow and provide you not only with great comics and illustrations but also helpful information that will help you in your craft. Check back frequently for more tips, tricks, and new content weekly from the HoneyDripper!

Comics Off the Page: “Invincible”

How Inktober Rose and Fell… And Rose Again
